Tutorial: how to glue your Matrix 1/8 tires like a pro
Tutorial: How to Glue Your Matrix 1/8 Off-Road Tires Like a Pro
Tire gluing is a crucial step in RC racing. A poorly glued tire can ruin a race or damage your equipment. In this guide, we will walk you through the step-by-step process of preparing and gluing a set of
🛠 Required Equipment
Before you begin, make sure you have everything ready on your workbench:
-
Tires and Rims: A set of new tires, inserts, and rims.
-
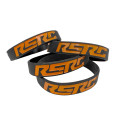
Gluing Bands: Ideally, two sets of 4 bands (one small and one large).
-
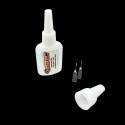
Quality CA Glue:
RSRC glue -
Cleaning: Acetone (ideal for "clay" compounds) and two clean microfiber cloths.
-
Tools: A hole punch (to vent the tires), a lighter (to unclog the needle), and a marker.
-
Safety: Safety glasses (mandatory to prevent glue splashes in your eyes) and work in a well-ventilated room.
1. Preparation and Venting
The first step is to allow air to circulate inside the tire to prevent excessive bouncing.
-
Use the hole punch to make two diametrically opposite holes (approx. 3 mm) in the center of the tread.
-
Next, insert the foams (inserts) into the tires. A circular motion with your fingers helps seat them naturally and quickly.
2. Degreasing: The Key Step
Without thorough cleaning, the glue will not bond properly, especially on Matrix clay compounds which can be oily from the factory.
-
Soak a microfiber cloth with acetone.
-
Carefully clean the tire sidewalls (the contact area) and the rim bead.
-
Pro Tip: Matrix rims come pre-sanded from the factory to improve adhesion. If your rims are smooth, don't hesitate to lightly sand them beforehand.
3. Fitting and First Gluing Band
Position the tire on the rim. Once properly adjusted:
-
Place a first gluing band to keep the tire seated flush against the rim.
-
Check all the way around to ensure the tire lip is perfectly seated in the rim channel.
4. The Gluing Process
This is where precision matters.
-
Slightly pull back the tire sidewall with your thumb.
-
Insert the glue needle and apply a steady bead while rotating the tire.
-
Pro Tip: Start at the "Matrix" logo so you know exactly when you've completed a full turn.
-
Once the glue is applied, place the second band over it to apply pressure.
-
Immediately wipe away any excess glue with your second clean microfiber (the one without acetone!).
5. Finishing Touches and Marking
Repeat the process for all four tires and both sides (outer then inner sidewall). RSRC glue dries very quickly; you can remove the bands after a few minutes.
Finally, use a marker to note inside the rim:
-
The compound hardness (e.g., Super Soft).
-
The position on the car (Front Right, Rear Left, etc.).
This helps maintain even wear and consistent handling for your chassis from one heat to the next.
Safety Note: If your glue needle gets clogged, pass it under a lighter flame for a few seconds to burn off the dried glue residue. Be careful of the fumes!
You are now ready to hit the track with a perfectly secured set of tires!
Vidéo
Share this content